Description:
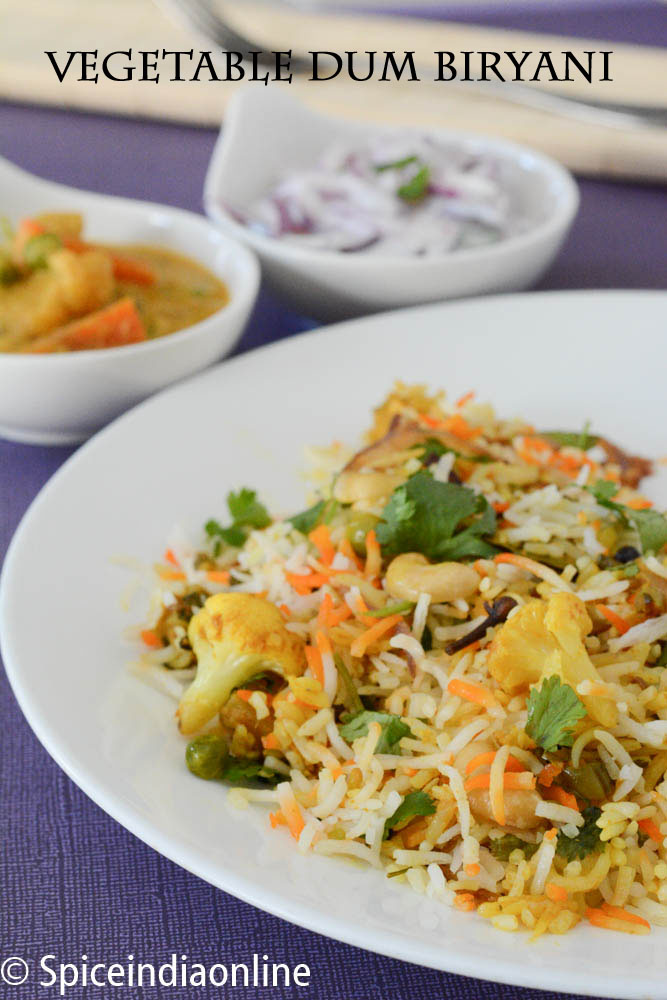
Biryani is a rice dish that’s popular in India and Pakistan and usually features a mix of rice, herbs, and spices as well as some type of vegetables or meat. Its one of the premium food we order when we go to a restaurant or even preparre at home during family gathering or special events. Who doesn’t like biryani? I think all of us do! What is the first thought that comes to your mind when you hear the word Biryani? for me its YUMMMMMM. Sometimes preparing biryani at home may look like a challenging task that too when we pick the dums style. Just keeping our fingers crossed and may be sometimes praying too, fearing that it may stick or burn to the bottom of the pan. Well not anymore, here is a simple method that you follow to get the perfect dum biryani. Thanks to this teenager Yaman who cooks awesome food and shares in his blog Cookingshooking which impressed me a lot and I tried his method and voila the best tasting decent Veg dum biryani! Here is how I prepared this Vegetable Dum Biryani…try and let me know your feedback.
Vegetable Biryani / Dum Biryani / Layered Vegetable Biryani/ How to make Vegetable Biryani / Dum Style Biryani / Briyani / Hyderabad Vegetable Dum Biryani / Biryani /Dum Pukht Style / Step by Step Dum style Biryani
| Ingredients to cook rice | |
|---|---|
| Basmati rice | 2 cups |
| Oil | 2 Teaspoons |
| Salt | 2 Teaspoons |
| Cumin seeds | 1 Teaspoon |
| Cloves | 3 |
| Cinnamon (1’stick) | 1 |
| Cardamon | 3 |
| Black peppercorns | 5 |
| Ingredients to make fried onions | |
|---|---|
| Onion | 2 medium size |
| Corn flour | 3- 4 Tablespoons |
| Oil | 1 cup |
| Ingredients for Biryani Gravy | |
|---|---|
| Carrot | 1 cubed small size |
| Potato | 1 cubed medium size |
| Green beans | 1/4 cup chopped |
| Cauliflower | 10 florets |
| Green peas | 1 Tablespoon |
| Green Chili | 3 small (slit open) |
| Ginger Garlic paste | 1 Teaspoon |
| Bay leaf | 2 |
| Black cardamon | 1 |
| Star anise | 1 |
| Mint leaves | 2 Tablespoon (chopped) |
| Coriander leaves | 2 Tablespoon (Chopped) |
| Yogurt | 1/2 cup |
| Red Chili powder | 1/2 teaspoon |
| Turmeric powder | 1/4 Teaspoon |
| Biryani masala powder | 1 Teaspoon |
| Oil / ghee | 2 Tablespoon |
| Ingredients for Dum | |
|---|---|
| Mint leaves | 3 Tablespoon |
| Coriander leaves | 3 Tablespoon |
| Cashew nuts | 10 |
| Saffron strands (dipped in few teaspoons of warm milk) | few (5-6) |
| Orange Food color | 1 pinch |
| Water | 1/4 cup |
| Ghee (optional) (drizzling) | 2 Tablespoon |
Method:
Soak basmati rice in water for atleast 45 minutes or to an hour.
Heat water in pan along with few drops of oil, salt, cumin seeds, cloves, black peppercorns, cinnamon and cardamon. Bring it a rolling boil.
Add the soaked rice and cook for 3-4 minutes over high flame. This way the rice will be about 70% done.
Strain and spread the rice on a big tray. Keep aside.
Choose the veggies that goes into the biryani. Cut them bite size pieces and try to keep the size uniform. I’ve marinated the potato with little turmeric and chilli powder(that’s optional)
Sprinkle corn flour on the onions that are cut lengthwise.
Deep fry them in oil.
Fry till they are golden brown as shown.
Drain excess oil by placing them on a paper towel.
Now lets start making the biryani. Heat oil/ghee in a pressure pan or any thick bottomed vessel. Fry the star anise, black cardamon, bay leaves and green chillies. Add the ginger garlic paste and saute for few minutes.
Add the veggies along with turmeric powder, chilli powder, Biryani masala powder and yogurt. Cover and cook for few minutes. The veggies have to be half cooked as they cook again in the dum process. Once done transfer the content to another bowl. Now lets start the layering process.
To start put some gravy on the bottom of the pan, add chopped mint and coriander leaves.
Followed by little nuts and sprinkle yogurt and some of the fried onions.
Layer with some cooked rice to top.
 Repeat the process and layer again.
Finally sprinkle the fried onion on top. Sprinkle the saffron soaked milk and food color mixed in water. Cover with lid and cook for 2-3 minutes over stove top in lowest flame.
Now put the pressure pan lid without the whistle and transfer the cooker to a big pot wit some water. This step actually prevents the birayni from burning. Cook for 30 minutes over low flame.
When done the rice looks super fluffy and fully cooked. Garnish with some more chopped coriander leaves.
Spread the content on a big tray and drizzle ghee while its still warm Check for salt and sprinkle if its necessary.
Look at my pressure pan which is all clean, the biryani does not burn on the bottom of the pan when cooked in this method.
Serve hot with veg kurma and raita!
Notes:
yield- 4 adult servings
You may cook this dum style in the following ways too 1. Cover with tight lid and cook over low flame on stove top for 15 minutes placing it on a iron pan. 2. Layer in a oven proof sauce pan, cover with foil and cook @ 350F for 20 minutes in a convection oven. 3 layer in a rice cooker and finish.
I’ve used India gate basmati rice which i soaked for 45 minutes and then cooked for 3 minutes over flame in a rolling boil and then finished with dum The rice turned long and fluffy.
You may add few shah jeera while boiling rice which adds more flavor. You may also add raisins if you like along with nuts.
Biryani Masala adds quite a restaurant touch to the dish. I used Shan Biryani masala which is mild and good. If you think the masala is too strong then cut down to 1/2 teaspoon instead of one.


16 Comments
I tried this for Christmas today, turned out to be yummax. Thank you mam.
Recipe rating : 10/10 or perfect 10.
Thank you very much for this recipe, it gave great flavour to the rice, and the colors looked amazing as well! The usage of a kadhai with some water to make a ‘water bath’for the cooker worked very well indeed! >:)<
The recipe is just perfect.. I have been searching for a very long time for a effective layer veg biriyani and landed up in ur page .. I have tried ur receipe a couple of times and it turned out so very well ! Thanks for sharing the wonderful methods.. Was very easy to adopt ..
Thanks dear Sowmya, that really made my day!
Dear Sricharan, here is it!
I tried Biryani. All steps were okay. But, when i put the rice into the serving dish. The color of rice was all mixed up, there where no white grains. Can you let me know why this happened?
Did you sprinkle the saffron and color? The color of the rice will be a little mixed some orange, some yellow and definitely some white. Mixing to much while drizzling ghee could cause that. Layering gravy shouldn’t be too watery, it has to be slightly on the chunky side. Other than these I don’t see a problem, try again and let me know. Thanks.
It turned out splendid.. I usually make non-veg biryani with shan sindhi biryani mix.. so used the same in this recipe as per your suggestion.. thanks.. I made “side gravy for biryani” with cauliflower( usually I make it with chicken bones) which also was yummy. Thanks for your wonderful recipes!!
Thanks Thamizh for your feedback. I’m happy that it turned out great! Biryani side gravy with cauliflower sounds interesting I have to try that combination one day! Thanks again.
Hi Mullai
Do you have any recipe for home made biryani masala and curry powder ?
Thanks
So I assume we add biryani masala powder along with chili powder here. It is missed in the step I guess. Can I know any specific brand we need to use??
Thanks,
Thamizh.
Thamizh, Thanks for pointing out, I did edit and ofcourse it goes along with the chilli powder. Usually biryani masala’s add lite restaurant touch to the recipe and I used Shan brand which is very mild and taste good too. MTR and Everest, achi are little strong so adjust to 1/2 teaspoon or your taste. Hope this helps and thanks again for your feedback. Do try and let me know how it turned out!
Excellent!You really have passion for cooking. Dum biryani in vegetarian method is a wonderful thinking. I really like the detail picture description. Thank you so much for sharing and making it possible for the viewers.
Thankyou Sharadha for your feedback! Pls do like us on facebook!
Looks yummy. It is a step by step process but
very well done. Love the pictures. Nicely explained.
Makes me want to try making it.
Thanks SSS, yes it is a long process but its worth it! Try and let me know how it turned out. Thanks for your feedback.